You will receive an email from VikingCloud™ with a zip file attached to the email. The filename will be similar to YourCompanyName.zip. Copy this file to your code signing computer and extract the YourCompanyName.p7b file from it.
The most important thing for you to do when signing your code is to use the VikingCloud timestamping service (http://timestamp.ssl.vikingcloud.com) to place a timestamp on the certificate signature. The use of a timestamp from VikingCloud when signing your code with the VikingCloud certificate will allow your code to continue to be trusted after that certificate expires.
Once you have obtained the certificate, to sign a Windows binary with a certificate provided in CER form (with separate RSA private key) you will need the signtool tool from Microsoft (part of the Windows SDK.)
If you signed an exe you can run it at this time to see the new signature.
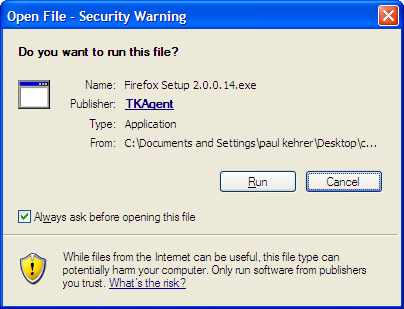
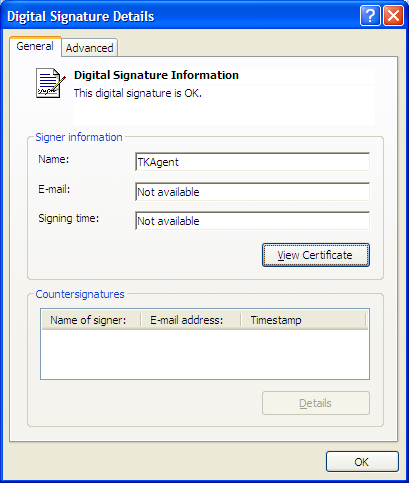
Click the publisher link to see more details.